DIA-X
A portable sound interface that bridges tactile play with extended audiovisual control

2026
Interactive Experience Design
Role / research & development, interaction design, 3D-printing, hardware-software integration
Duration / 6 weeks
As I worked on more real-time audiovisual projects, I began to feel the limits of my setup. While my MPK Mini worked well for sequencing chords in the studio, it wasn’t designed for hands-on interaction. Time spent in collaborative spaces made this gap clearer. I wanted something small enough to fit into my laptop bag and usable without a computer. These observations led me to explore how tactile interaction can extend into immersive environments and imagine a device centred on essential controls that could work both standalone and as part of a larger system.
The outcome is DIA-X, a portable prototype designed for tactile control, featuring a dual-mode system that shifts between instinctive play and extended audiovisual performance. Compact enough to travel with and capable of generating sound on its own, it enables hands-on experimentation while scaling into larger immersive experiences.
DIA-X Experience
Designed around a dual-mode experience, DIA-X enables users to transition between standalone exploration and an extended network audiovisual control.

In Local Mode, users can experiment with sound through immediate tactile interaction, anywhere, without a computer.
In Extended Mode, the same interface extends beyond standalone use, allowing users to control audiovisual systems in TouchDesigner and Ableton Live via Open Sound Control (OSC).


The interface provides startup feedback, sound font selection and transitions between Local and Extended states. A sound-responsive diamond shape visualises triggered sounds, adding another layer to the user experience.


Compact enough to fit into an everyday bag, DIA-X is designed for easy transitions between creative spaces and wherever inspiration takes you. ☺︎
Design Process
From concept to tangible prototype.
System Design | Form Development | Visual Direction
System + Components


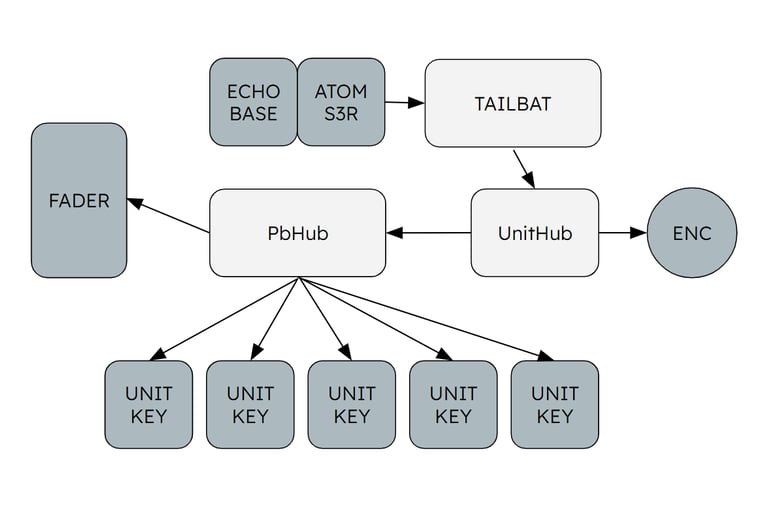

Key Components:
1x AtomS3R
1x Atomic Voice Base
1x Unit Fader
1x Encoder
5x Unit Keys
Connectors:
1x Tailbat
1x UnitHub
1x PbHub
Using M5Stack components, I focused on the essential sensors: a fader, encoder and five keys, prioritising portability and a compact hardware footprint.
Early Layout Sketches
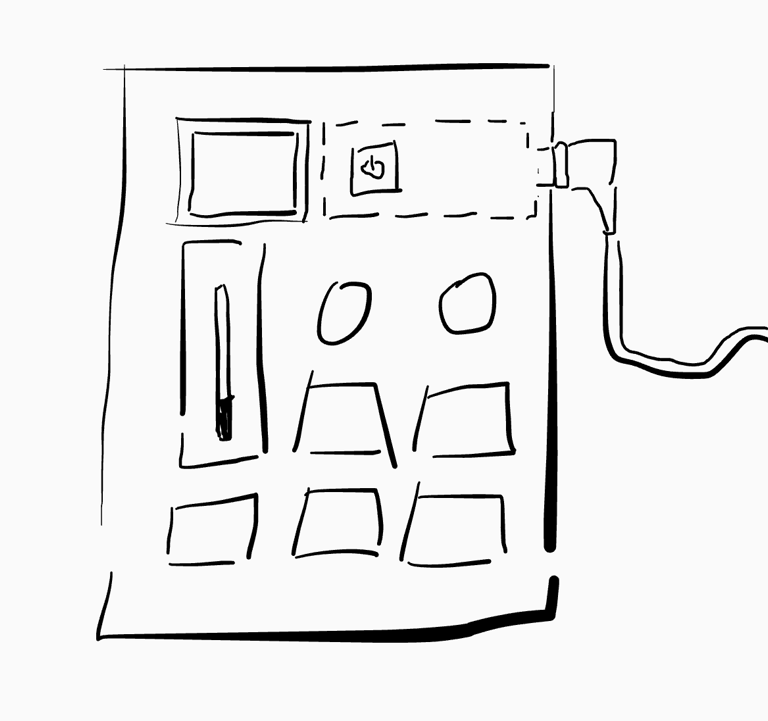


I began by sketching different layout configurations to explore how the components could work together. I didn’t spend too much time at this stage, as I wanted to move quickly into testing the ideas in physical form.
Testing Spatial Layout with LEGO
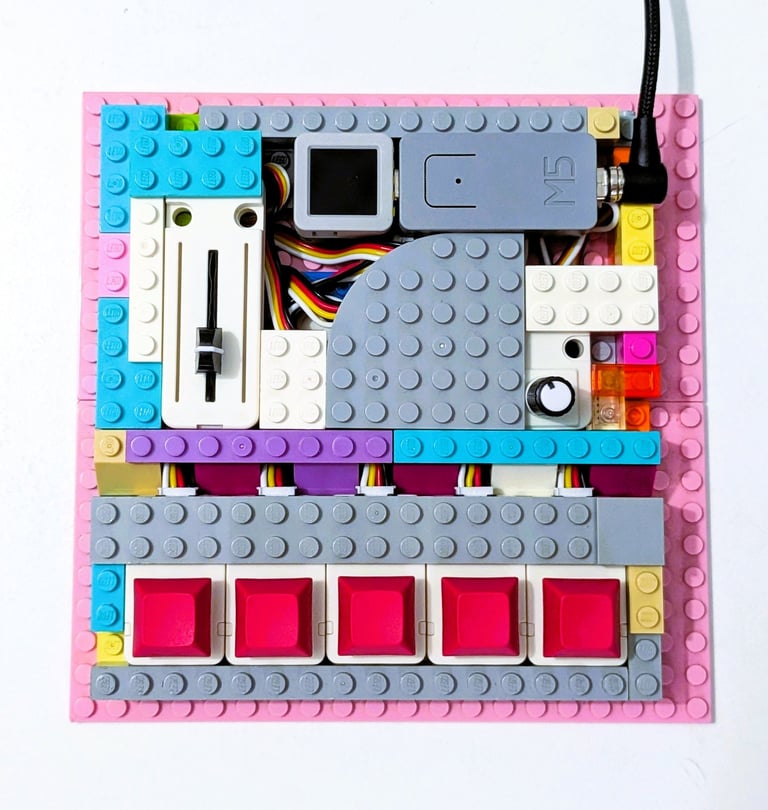

I moved on to prototyping with LEGO to quickly explore the system’s spatial layout. Its modularity allowed me to freely rearrange components, helping me test spacing, refine the configuration, and take more accurate measurements once the layout was finalised. The Lego model helped explore the overall form factor, button placement, and how users naturally held the device.
It was a hands-on but challenging process. With many parts to account for, maintaining compactness became a key constraint. After a few hours of focused iteration, the components finally sat together well and the layout felt resolved. Through this process, I realised my thinking becomes clearer through making and building.
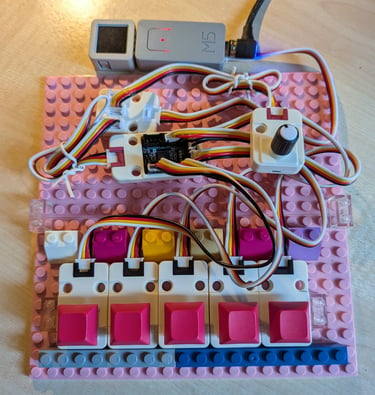
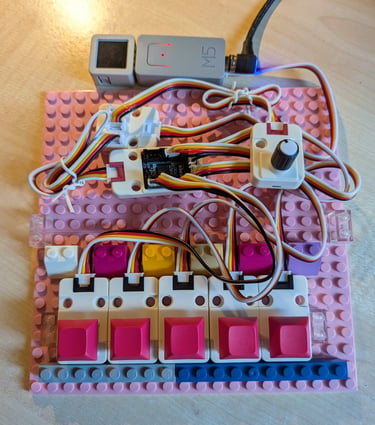
Embracing the mess and the unknown.


3D Print Housing


With the layout established, I built the 3D-printed prototype from the inside out, much like constructing a house. The base was designed with two levels to accommodate the electronic components while keeping the overall footprint as compact as possible.
Starting with the internal components, I validated clearances and fit before iterating on the enclosure, allowing the form to evolve alongside the hardware with each prototype.
Exploded view of the 3D-printed housing and components assembly.
Base Exploration
Iterations of the 3D-printed base prototype, testing form, fit and component integration.


Cover Exploration
Iterations exploring the cover design, balancing aesthetics and functionality.


After exploring numerous colour combinations, I found myself losing sight of the original vision for DIA-X. Revisiting my mood board helped me refine the final colour palette and realign the design.
I realised I was consistently drawn to neutral silver tones accented with pops of red, green, and blue. These colours became the final prototype's visual identity.


Defining the Visual Direction
Final Prototype Reflections
For the final design, I leaned into a retro-futuristic aesthetic, pairing a black base with a silver top housing reminiscent of classic audio equipment while giving it a contemporary feel. RGB accents on selected controls add a subtle sense of playfulness. To reinforce the product's identity, the speaker grille takes the form of an X, a distinctive detail that gives DIA-X its own character.


I'm happy with how DIA-X turned out. Looking back, I realised that having a clear vision of the outcome made learning a new tool much faster. Instead of learning CAD in isolation, I learnt it in service of bringing DIA-X to life.
Most importantly, the project changed the way I design. I learnt that rapid, hands-on iteration often leads to better insights than endless sketches. Building and testing ideas helped me uncover problems earlier and make more informed design decisions. DIA-X also taught me to think across disciplines, from interaction design and 3D printing to hardware-software integration. I'm excited to put DIA-X into more people's hands and continue iterating on the design.

